Creating Durable Outdoor Pathways with Brick and Hand Tools
Creating Durable Outdoor Pathways with Brick and Hand Tools
Transforming your garden with a well-laid outdoor pathway not only boosts curb appeal but also improves functionality, directing foot traffic and preventing weed growth. Using bricks combined with reliable hand tools provides a cost-effective and satisfying DIY approach. This guide will walk you through the experience, selecting essential tools, and best practices to create a durable, professional-looking pathway.
Why Choose Brick for Your Outdoor Pathway?
Bricks are a popular choice because they are sturdy, long-lasting, and visually appealing. Their natural texture offers excellent slip resistance, making them safe for walking, even in wet conditions. Additionally, brick pathways blend seamlessly with various landscape styles, from traditional to modern.
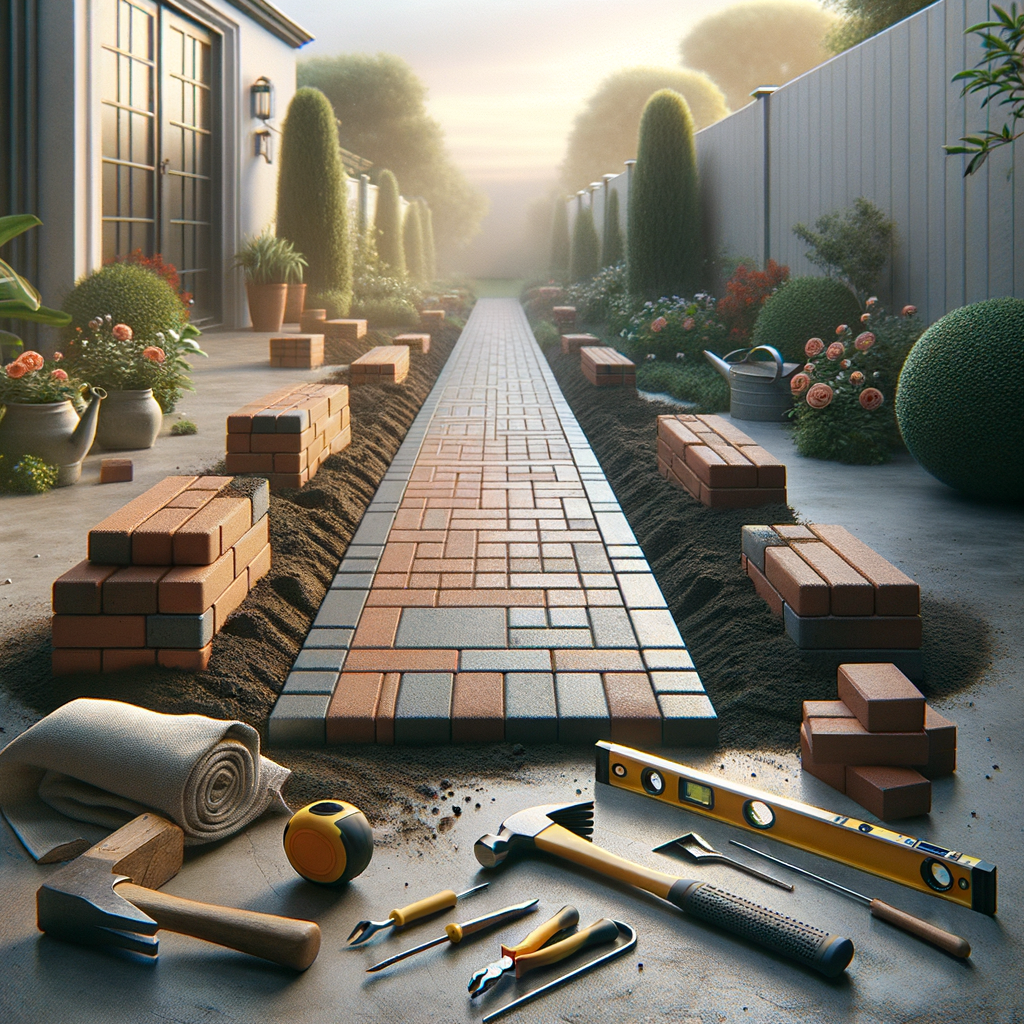
Essential Hand Tools for Brick Pathway Construction
Creating a pathway with bricks requires precision and patience. Having the right hand tools is crucial for achieving a professional finish. Here's what you'll need:
Basic Tools
- Pointing Trowel: For applying and smoothing mortar.
- Brick Hammer: To cut and shape bricks accurately.
- Level: Ensures the pathway is even and flat.
- Tape Measure: For accurate measurements.
- String Line and Stakes: To mark the layout.
- Shovel: For excavation and preparation.
- Spirit Level: To check the surface's levelness.
Additional Tools
- Masonry Brush: To clean excess mortar.
- Rubber Mallet: To gently tap bricks into place without damaging them.
Step-by-Step Guide to Building Your Brick Pathway
1. Planning and Design
Start by deciding the pathway's shape and size. Use the string line and stakes to mark the outline, ensuring the layout complements your garden design. Consider the brick pattern—running bond, herringbone, or basket weave—each offers a different aesthetic.
2. Excavation and Base Preparation
Remove any grass, soil, or debris within the marked area. Excavate to a depth of around 15-20 cm to accommodate the sub-base, bedding layer, and bricks. Compact the soil thoroughly.
3. Installing the Sub-base
Lay a layer of crushed aggregate or gravel (about 10-15 cm), compacting it with a hand tamper or plate compactor for stability.
4. Adding the Bedding Layer
Spread sharp sand or a sand and cement mix over the sub-base, levelling it with a screed board. Ensure the surface is smooth and slightly inclined for drainage.
5. Laying the Bricks
Begin at the starting point and lay bricks in your chosen pattern. Use the spirit level and string line to keep rows straight and level. Tap each brick into place with a rubber mallet.
6. Cutting and Shaping
Use the brick hammer to cut bricks as needed to fit edges or curves. Always wear safety glasses when cutting.
7. Finishing
Fill the gaps with sand, sweeping it into the joints to lock the bricks in place. Use a brush to clean excess mortar or sand from the surface.
Tips for Long-Lasting Pathways
- Proper Foundation: Ensure the base is well compacted and stable.
- Consistent Joints: Keep joints tight to prevent shifting.
- Edge Restraints: Install edging to keep bricks in place.
- Regular Maintenance: Sweep and re-sand joints periodically.
Summary
Building a brick pathway with hand tools is both practical and rewarding. It allows you to craft a durable, attractive feature that enhances your garden for years to come. The key is careful planning, proper preparation, and precise execution. With patience and the right tools, you can achieve a professional finish that matches your DIY skills.
Ready to get started? Explore our range of hand tools for masonry to find everything you need for your project. For premium bricks and supplies, visit our garden paving category. Happy building!
Your garden transformation starts with the right tools and know-how. For more expert advice and products, keep browsing Cynnal’s DIY & Crafts section.